Most adults experience low back pain at some point in their lives. According to the
American Academy of Orthopaedic Surgery this is the reality for 60-80 percent of the
population. Commonly, low back pain is the result of muscle or ligament strain.
However, for many people low back pain is also accompanied by leg pain caused by a
herniated disc.
A herniated disc is a condition that can occur anywhere along the spine, but usually
occurs in the lower back. It is sometimes called a bulging, protruding, or ruptured disk.
It is one of the most common causes of lower back pain, as well as leg pain or “sciatica.”
Although a herniated disc can be very painful, most people feel much better within a
few weeks.
Five vertebrae make up the lower back. This area is called your lumbar spine. In
between your vertebrae are flexible intervertebral discs. These discs are flat and round,
and about a half inch thick. Intervertebral discs act as shock absorbers between the
vertebrae. A disc begins to herniate when its jelly-like nucleus pushes against its outer
ring due to wear and tear or a sudden injury. The pressure against the outer ring may
cause lower back pain. I like to think of each disc as a jelly filled donut and the
vertebrae above and below it as two fists. If we bend the top fist forward the jelly slides
back and may ooze out the back of the fists. This is a simple analogy of what happens
in our spine when we bend our back to lean forward. If the pressure continues, the
jelly-like nucleus may push all the way through the disc’s outer ring or cause the ring to
bulge. This puts pressure on the spinal cord and nearby nerve roots. When a nerve root
is irritated, there is often pain, numbness, and/or weakness in one or both of your legs.
A herniated disc is most often the result of natural, age-related wear and tear on the
spine. This process is called disc degeneration. As we age, the water content in the discs
decreases and the discs become less flexible. The discs begin to shrink and the space
between the vertebrae becomes narrower. This normal aging process makes the discs
more prone to herniation. A traumatic event, such as a fall, can also cause a herniated
disc.
In most cases, low back pain is the first symptom of a herniated disc. This pain may last
for a few days or weeks but usually gets better with time. Although disc herniation is a
very common source of back pain always consult your doctor for a proper diagnosis.
If you have back pain it is important to remember that proper bending and lifting
techniques are essential. We want to be certain that physical activity is slow and
controlled especially when bending forward. Often, we initiate lifting from bending
through the spine and thus placing a lot of strain on the back. Your back is much
stronger in a neutral position. When lifting, hinge forward at the hips with a straight
spine and let your legs do the work. Remember to PUSH with the legs instead of
PULLING with your back.
Think of your spine as a metal coat hanger. The more we bend back and forth from the
low back, the more vulnerable the coat hanger becomes. If we do this too many times,
the coat hanger snaps. That is basically what happens when we are speaking about disc
related back problems. Avoid the coat hanger affect by using the hips as a hinge. This
will help prevent disabling injuries to the lower back.
Below are a few exercises that will help keep your back healthy.
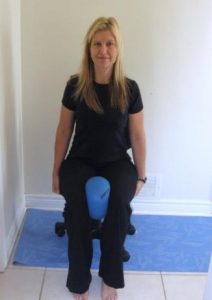
1. Pillow or Ball Squeeze.
The gluteal muscles are a group of three muscles which make up the buttocks. This
group of muscles is very important for protecting our low back. A very simple
technique to reconnect with the gluteus is to squeeze a ball or pillow between the knees,
count to five and release. Be certain to breathe as you count. Repeat 3 sets of 10.
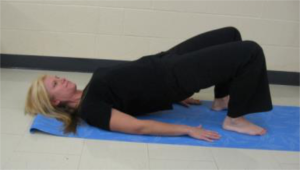
2. The Bridge
The next exercise that is very important for the low back is bridging. Start by lying on
your back, feet flat on the floor, and bracing your abs. To do this, imagine someone was
going to poke you in the stomach. The abs should engage without sucking in or pushing
out…just simply waking up or facilitating. Next, put a little energy in your toes so you
don’t overuse the hamstrings. Then squeeze your bottom and lift it off the floor until
your knees, hips, and shoulders all make a straight line to the floor. Hold for a count of
five, then lower and relax. Repeat 5x.
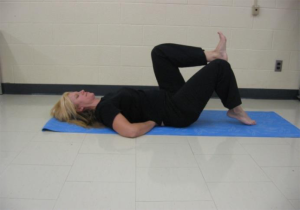
3. Dead Bug/Prep- Low Ab Strengthener
Start by lying on your back with hands placed under your back at about navel height.
Inhale to cinch the waist which puts energy against the hands behind the back. Keep
the pressure on the hands as you lift and lower one leg to the floor. If it is
uncomfortable to have your hands behind your back, be certain to keep your bottom rib
anchored to the mat during the exercise. This exercise is not about touching the floor as
you lower your leg, it is about going as low as you can while keeping your spine
anchored. To increase difficulty, straighten the leg as you lift and lower.
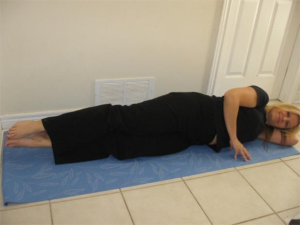
5. Double Leg Lift Side – Oblique
Next, roll over to the side & allow your head to be supported by your arm or a pillow.
Engage your abdominal muscles by cinching your waist especially below your navel.
Inhale to prepare then exhale and lift both legs. Ideally the toes and heels should stay
connected. Imagine holding a paper between your inner thighs. This is a very
important exercise to engage the muscles on your side between the ribs and the hips.
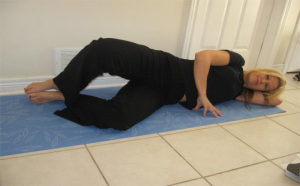
6. The Clam – Glueteus Minimus
While still lying on your side, bend the knees. To line up your body in the proper
position, imagine your head, bottom and feet are all against a wall behind you. Next
open & close your knees while keeping the heels connected. This exercise is very
important because it facilitates the gluteus medius which is a deeper set of gluteal
muscles that help protect the back. Repeat 10-15x each side
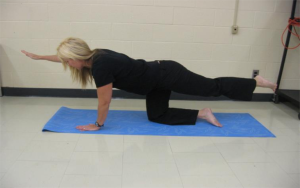
8. Opposition – Latissimus Dorsi or Back Strengtheners
Start this exercise on all fours. The knees should be lined up under the hips and the
hands under the shoulders. Fingers should be nice and wide, and the weight of the
hands should be on the thumb side as it is stronger. Now imagine someone is going to
push you over. Get strong in this position by cinching or bracing the abs. Next squeeze
your gluteal muscles to lift one leg. Now see if you can lift the opposite arm. Try tapping
the hand and foot down at the same time and then squeezing the bottom to lift again.
Lift and lower three times each side. This exercise works the entire back.
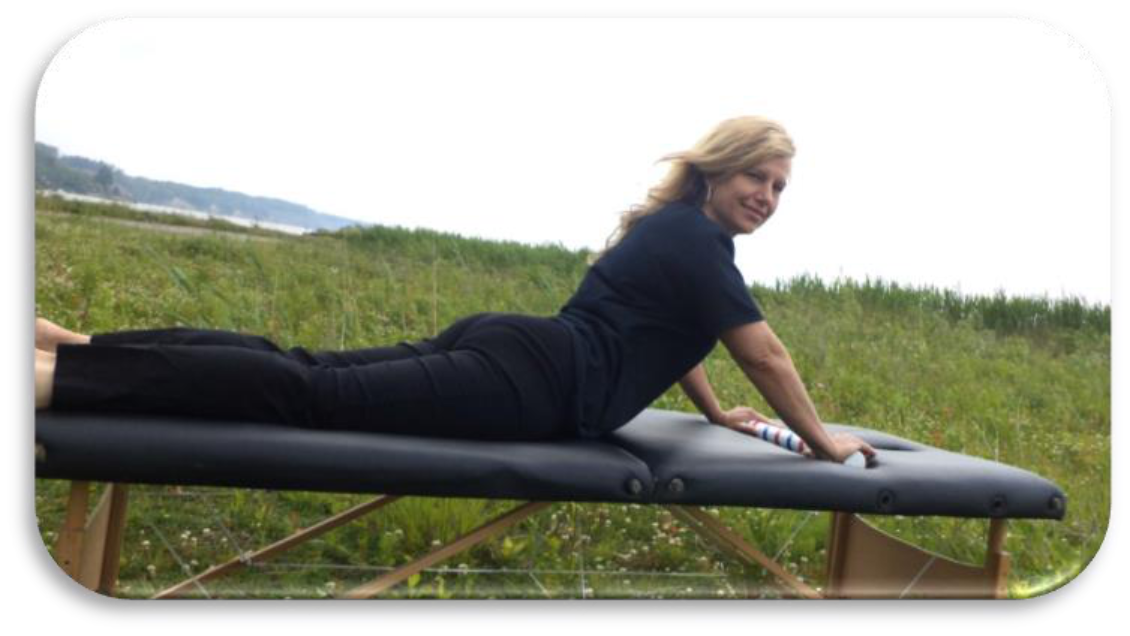
McKenzie Exercise/Sloppy Push Ups: This is a movement that may bring relief
for people experiencing chronic disc related back pain. It’s the perfect antidote for
bending forward all day in the garden or golfing. Remember earlier when I was using
the jelly donut analogy? When we are dealing with disc related back problems the
nucleus of the disc bulges out pressing against our central nervous system resulting in
pain. Sometimes with disc related pain, spinal extension can push that “jelly” back in
place which may help relieve that pain. Start by lying on your stomach with your
palms at your side under your shoulders in the front. Next press up into spinal
extension (you can rest on your elbows if you like) and hold counting out loud to five
then lower. Rpt 5x up to three times per day.

References:
Stuart Mc Gill: Low Back Disorders
Oxford University: Physiotherapy Department
Robin McKenzie Institute of Canada
Shirley Sarhman: Movement System Impairment Syndromes